How To Create A Scrolling Banner In Sharepoint
SharePoint 2013 brought an excellent web part to get content from the search index, called "Content search web part". Using the content search web part, We can build a simple image rotator or the content slider in few steps.
Content Search Web part is available only on SharePoint 2013 enterprise edition!
Step 1 – Create a Picture Library and upload images:
Go to your SharePoint site, create a new picture library.

Give it a Name, Say "Slides"

Upload required banner images to the library

Step 2: Trigger Incremental Crawl:
Trigger an incremental crawl or wait for the incremental crawl schedule to complete, So that the picture library we created added to the search index.
Step 3: Add Content Search Web Part to the page
Navigate to the page where you would like to add a content slider, Click on Site settings gear >> Edit page >> On Insert tab, Click on Web part >> Under the content Rollup, select "Content Search" and then click on "Add" button.

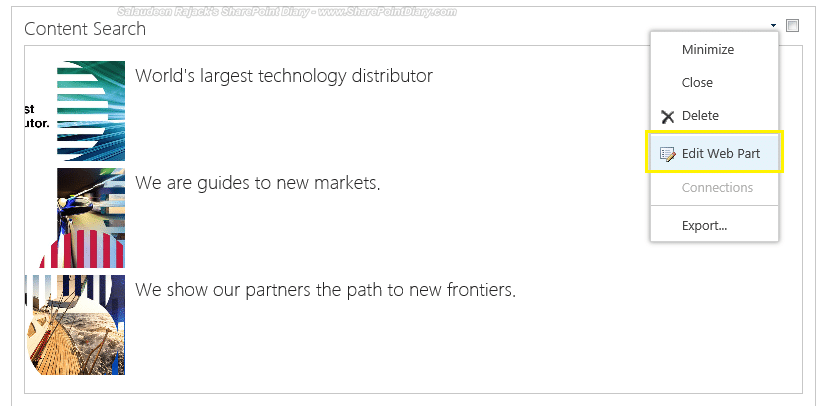
Now, the web part should look like the below image. Click on "Edit Web Part" from the web part menu,

Click on "Change Query" button from the web part properties pane.

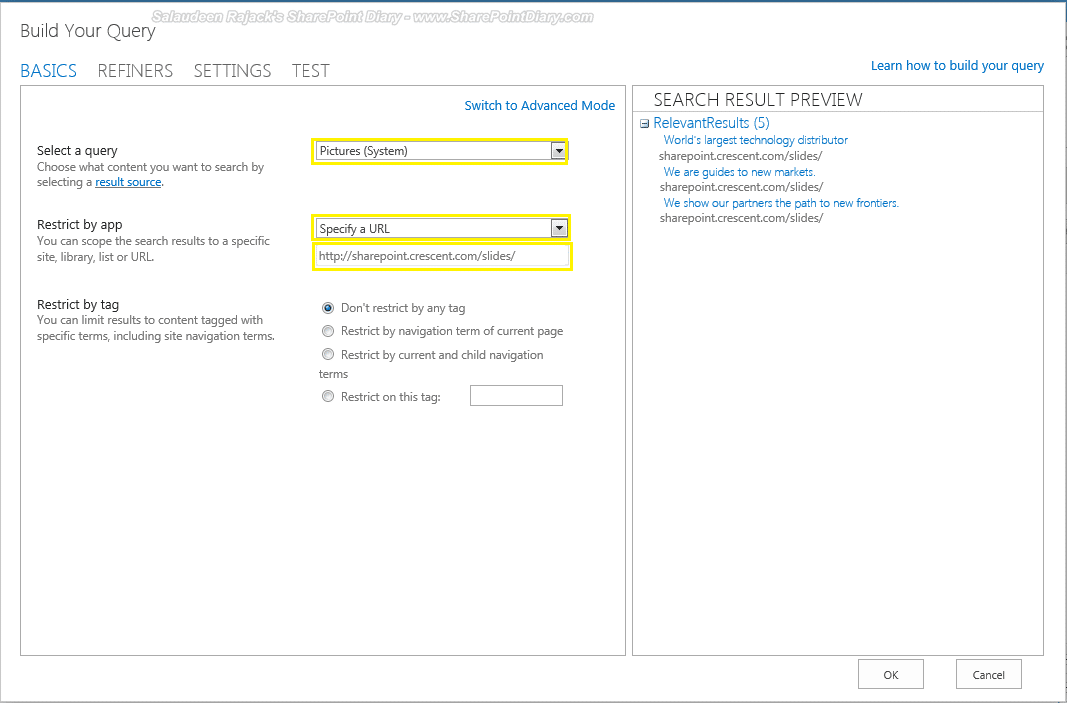
Select a query as: Pictures (system) and Restrict by app as : Specify a URL. In URL field, enter the URL of your picture library and Click on OK.

Now, in Edit Properties, Set the Number of items to show as per your requirement, and expand the Display templates section. Set the Control template as "Slideshow" and Item template as "Large picture".

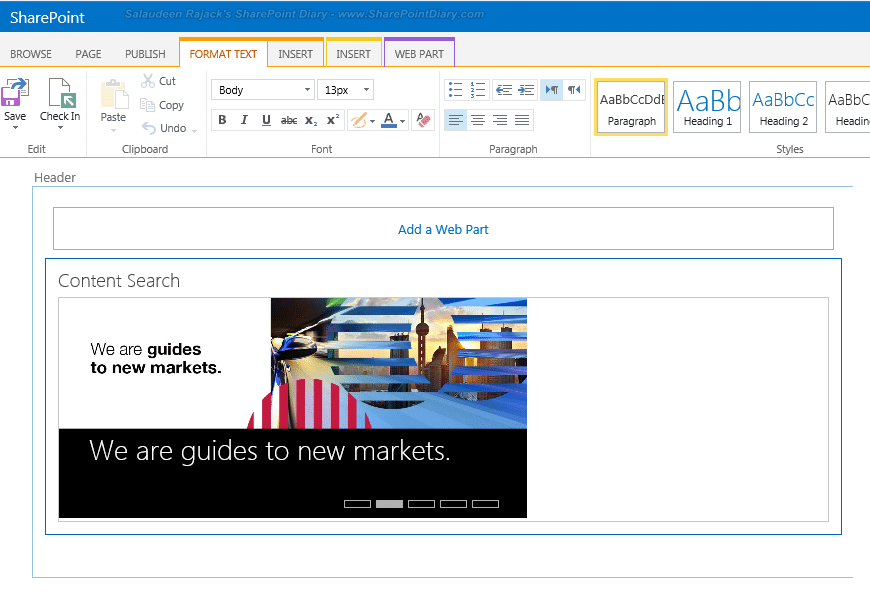
That's all! Done, This is what we get in the page!

Well, what we've done above is just a slideshow. On clicking banner images, they take us to the individual image from the banner. However, We may have to link banners to different URLs. Say, on clicking the above "New markets" banner, you may want to send users to http://your-sites/departments/new-markets/ isn't it? So what this step brings, in addition, is: When the user clicks on the banner, where it should take them, Lets head on to the next step:
SharePoint 2013 generates managed properties for site columns. If you add a column directly to a list, it will not generate a managed property automatically!
Step 1: Add a new Site column and Include it in the library
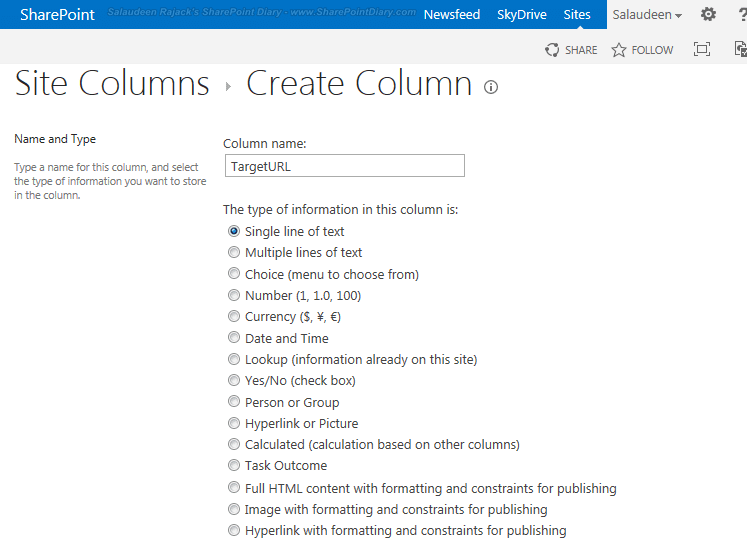
We need a column to hold the target URL (when the banner is clicked!), So let's create a new site column and add it to the Slides picture library. The reason we create a site column, rather than adding a column to the list directly is: We need a Managed property! Fortunately, in SharePoint 2013, all site columns will be automatically created as managed properties!
Navigate to "site action >> Site settings >> Site columns >> Create new site column "TargetURL"
Add site column to the Library:
Go to list settings >> Add from existing site column >> and choose the site column "TargetURL".

Once done, update TargetURL value for all banner images. 
Once done, initiate either incremental/full crawl – This will create a new crawled property as well as managed property for the custom site column we've added to the picture library.

Verify the managed property:
Go to : Site settings >> search schema >> Managed properties. Make sure, you get the Managed property listed.

Now, configure the managed property in the content search web part properties. Go to Edit page, Modify web part, And set the "Link URL" value to the managed property created from our custom column (TargetURL).

That's all! Now the banner images will be pointing to the URLs specified in TargetURL column!
How To Create A Scrolling Banner In Sharepoint
Source: https://www.sharepointdiary.com/2014/04/rotating-banner-in-sharepoint-2013-using-content-search-webpart.html
Posted by: suttonyoughtley.blogspot.com

0 Response to "How To Create A Scrolling Banner In Sharepoint"
Post a Comment